In this blog we will demonstrate how to configure an advanced UniFi network. The equipment we will be using is:
- UDM-Pro - https://www.gowifi.co.nz/ubiquitinetworks/udm-pro.html
- USW-24-POE - https://www.gowifi.co.nz/ubiquitinetworks/usw-24-poe.html
- UAP-NanoHD - https://www.gowifi.co.nz/ubiquitinetworks/uap-nanohd.html
- UAP-FlexHD - https://www.gowifi.co.nz/ubiquitinetworks/uap-flexhd.html
Referring to an advanced network, I will demonstrate the following features:
- Multiple VLANs with DHCP
- WiFi with additional settings
- Untagged switch ports for end user connectivity
Initial Setup
Step 1: Connect all devices together and run through the UDM-Pro setup wizard
Step 2: Run through the UDM-Pro setup wizard
- We have a handy blog here: https://help.gowifi.co.nz/support/solutions/articles/48001164815-how-to-set-up-a-unifi-udm-pro-on-pppoe-wan
Step 3: Adopt all devices and perform any upgrades that may be available
Multiple VLANs with DHCP
We will now configure 2 VLANs for WiFi networks. One for staff devices (VLAN20) and another for guest devices (VLAN30).
Navigate to the settings page of the UniFi Network Controller and select "Networks"

Select "Add New Network" and name your network

Select "Advanced" and fill in your VLAN ID

De-Select "Auto Scale Network" if you wish to modify the default DHCP IP range

Repeat the above steps as needed to create all of your VLANs
WiFi with additional settings
We will now configure 2 WiFi networks, Staff and Guest, and configure some additional settings such as WiFi Scheduler, L2 Isolation, Bandwidth Profile and Broadcasting APs.
Navigate to the settings page of the UniFi Network Controller and select "WiFi"

Select "Add New WiFi Network" and enter a name (SSID), password and select the Network you want associated - in our case Staff Network - and select "Add WiFi Network"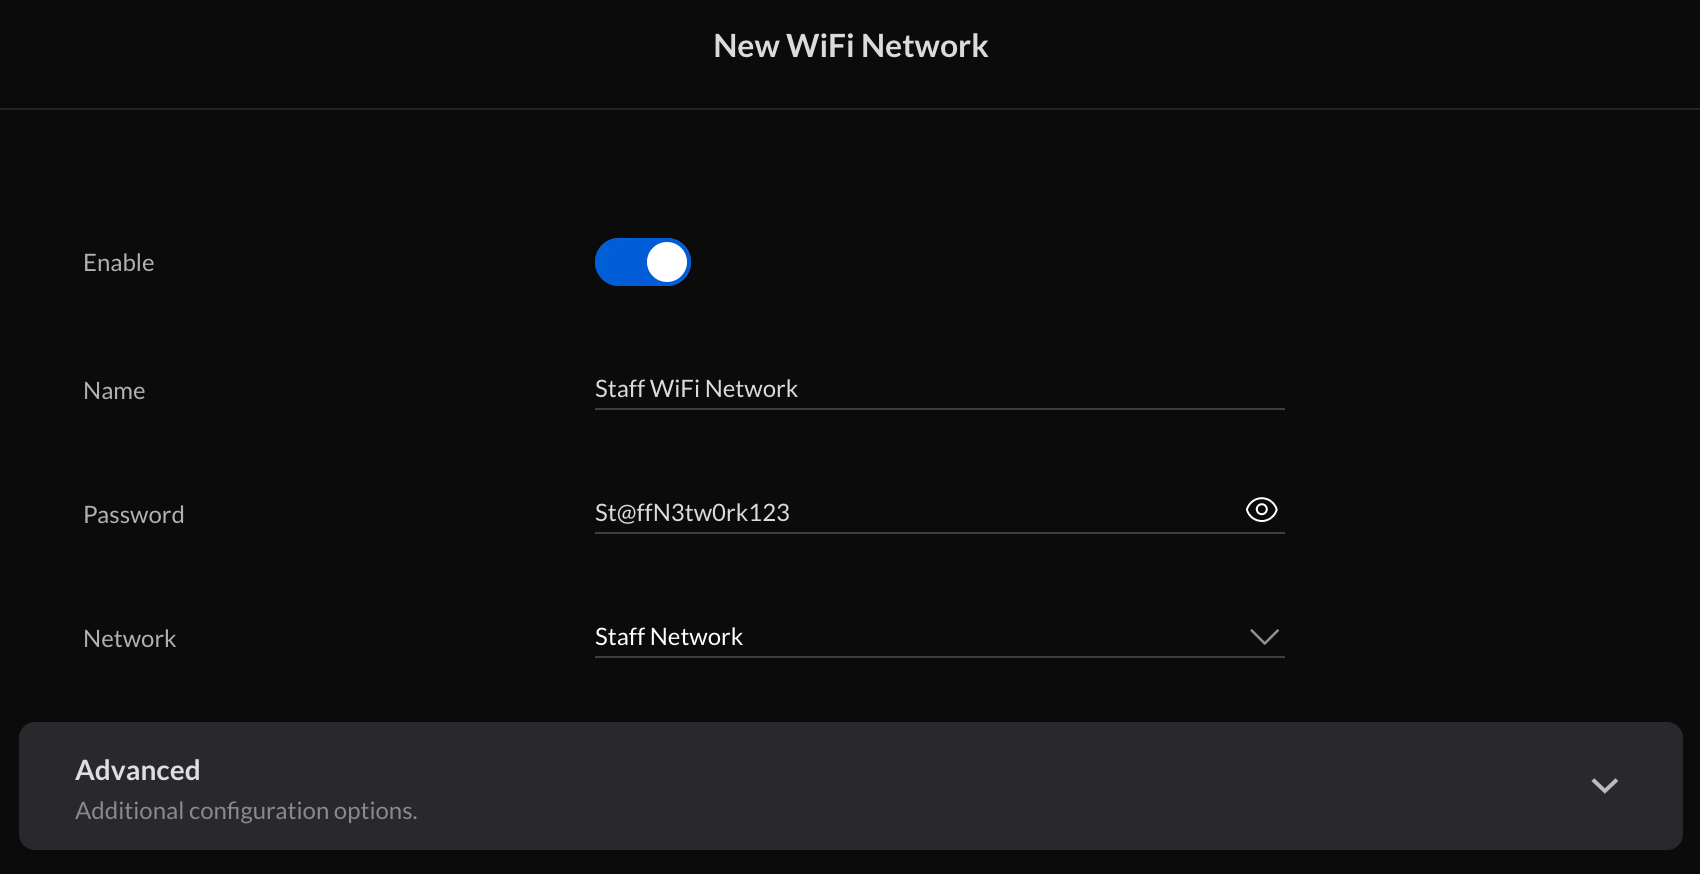
For our Staff network, we want to disallow guests from connecting after hours. To achieve this, under "Advanced", scroll down to "WiFi Scheduler" and define your after hours


We will now add additional settings to our Guest WiFi Network
Select "Advanced" and under the "Broadcasting APs" option, select "Create New AP Group". Here we will create an AP Group called "Reception". This setting allows you to define which specific APs will broadcast a given WiFi Network whereas the default is all APs.

Check the "L2 Isolation" toggle to disable communication between clients at layer 2 (ethernet).

Fill in info about info about isolation after testing
The last setting we will add is a Bandwidth Profile. Firstly, we will navigate to the "Advanced Features" page of the UniFi Network Settings. From here we will navigate to the "Bandwidth Profile" section and select "Add Bandwidth Profile".

From here we can set a limit on download and upload speed for users that connect to our guest network.

We can now edit our Guest WiFi Network and select our Bandwidth Profile in the "Advanced" Settings.

Untagged switch ports for end user connectivity
Not all devices join a network via WiFi and can often connect via ethernet. An example of this would be a staff member's desktop computer. Often that end device should belong to a specific VLAN - Staff in our example.
To set a VLAN for a specific port on your switch, open to the "Advanced Features" page of the UniFi Network Settings and navigate to "Switch Ports". Here you should see a profile automatically generated for every VLAN you've configured.

Native Network indicates the "Untagged" network associated with the switch port. To apply this to a given port, navigate to the "Devices" page and click on your intended switch to open the device's properties window.

Select "Ports" and then the switch port you want to modify. From here, select "Port Profile" and choose the appropriate VLAN/Profile.

These are only a few of the Advanced configurations possible with the UniFi Network Controller. Please leave a comment if you want more blogs like this in the future.