Connecting to your Milesight NVR for the first time
Author: Daniel Allin
Modified on: Fri, 4 Jun, 2021 at 9:19 PM
- Connect your Milesight NVR to your network and power it on.
- Download Milesight Smart Tools https://www.milesight.com/support/download
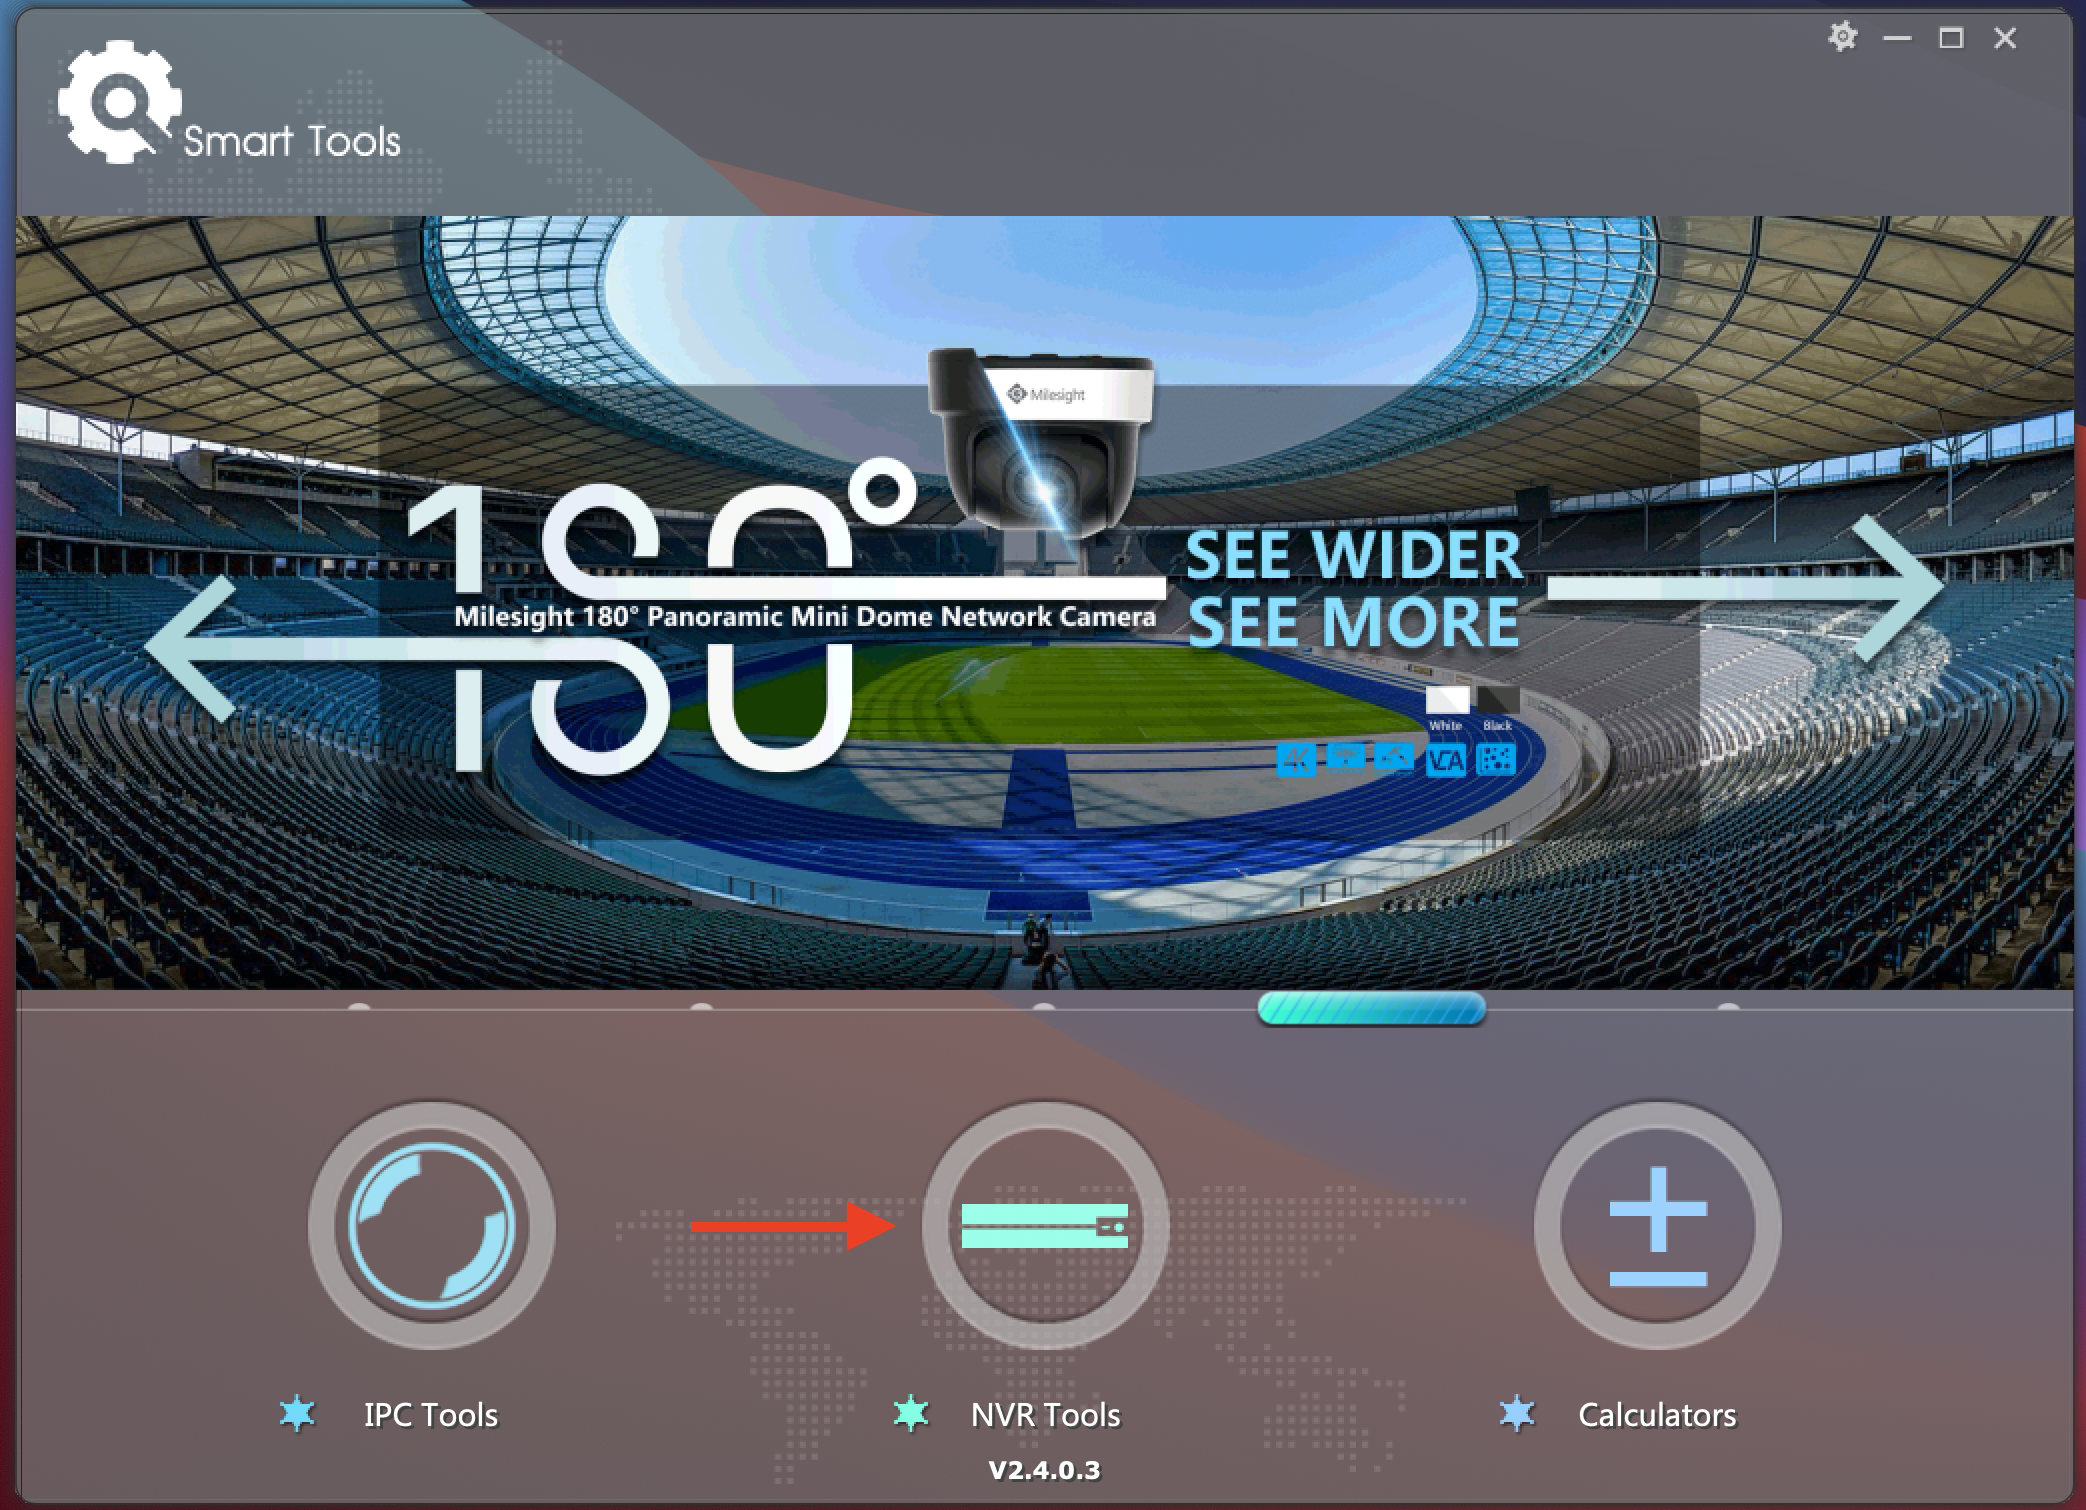
- Install the application and then open it.
- Click on the NVR Tools

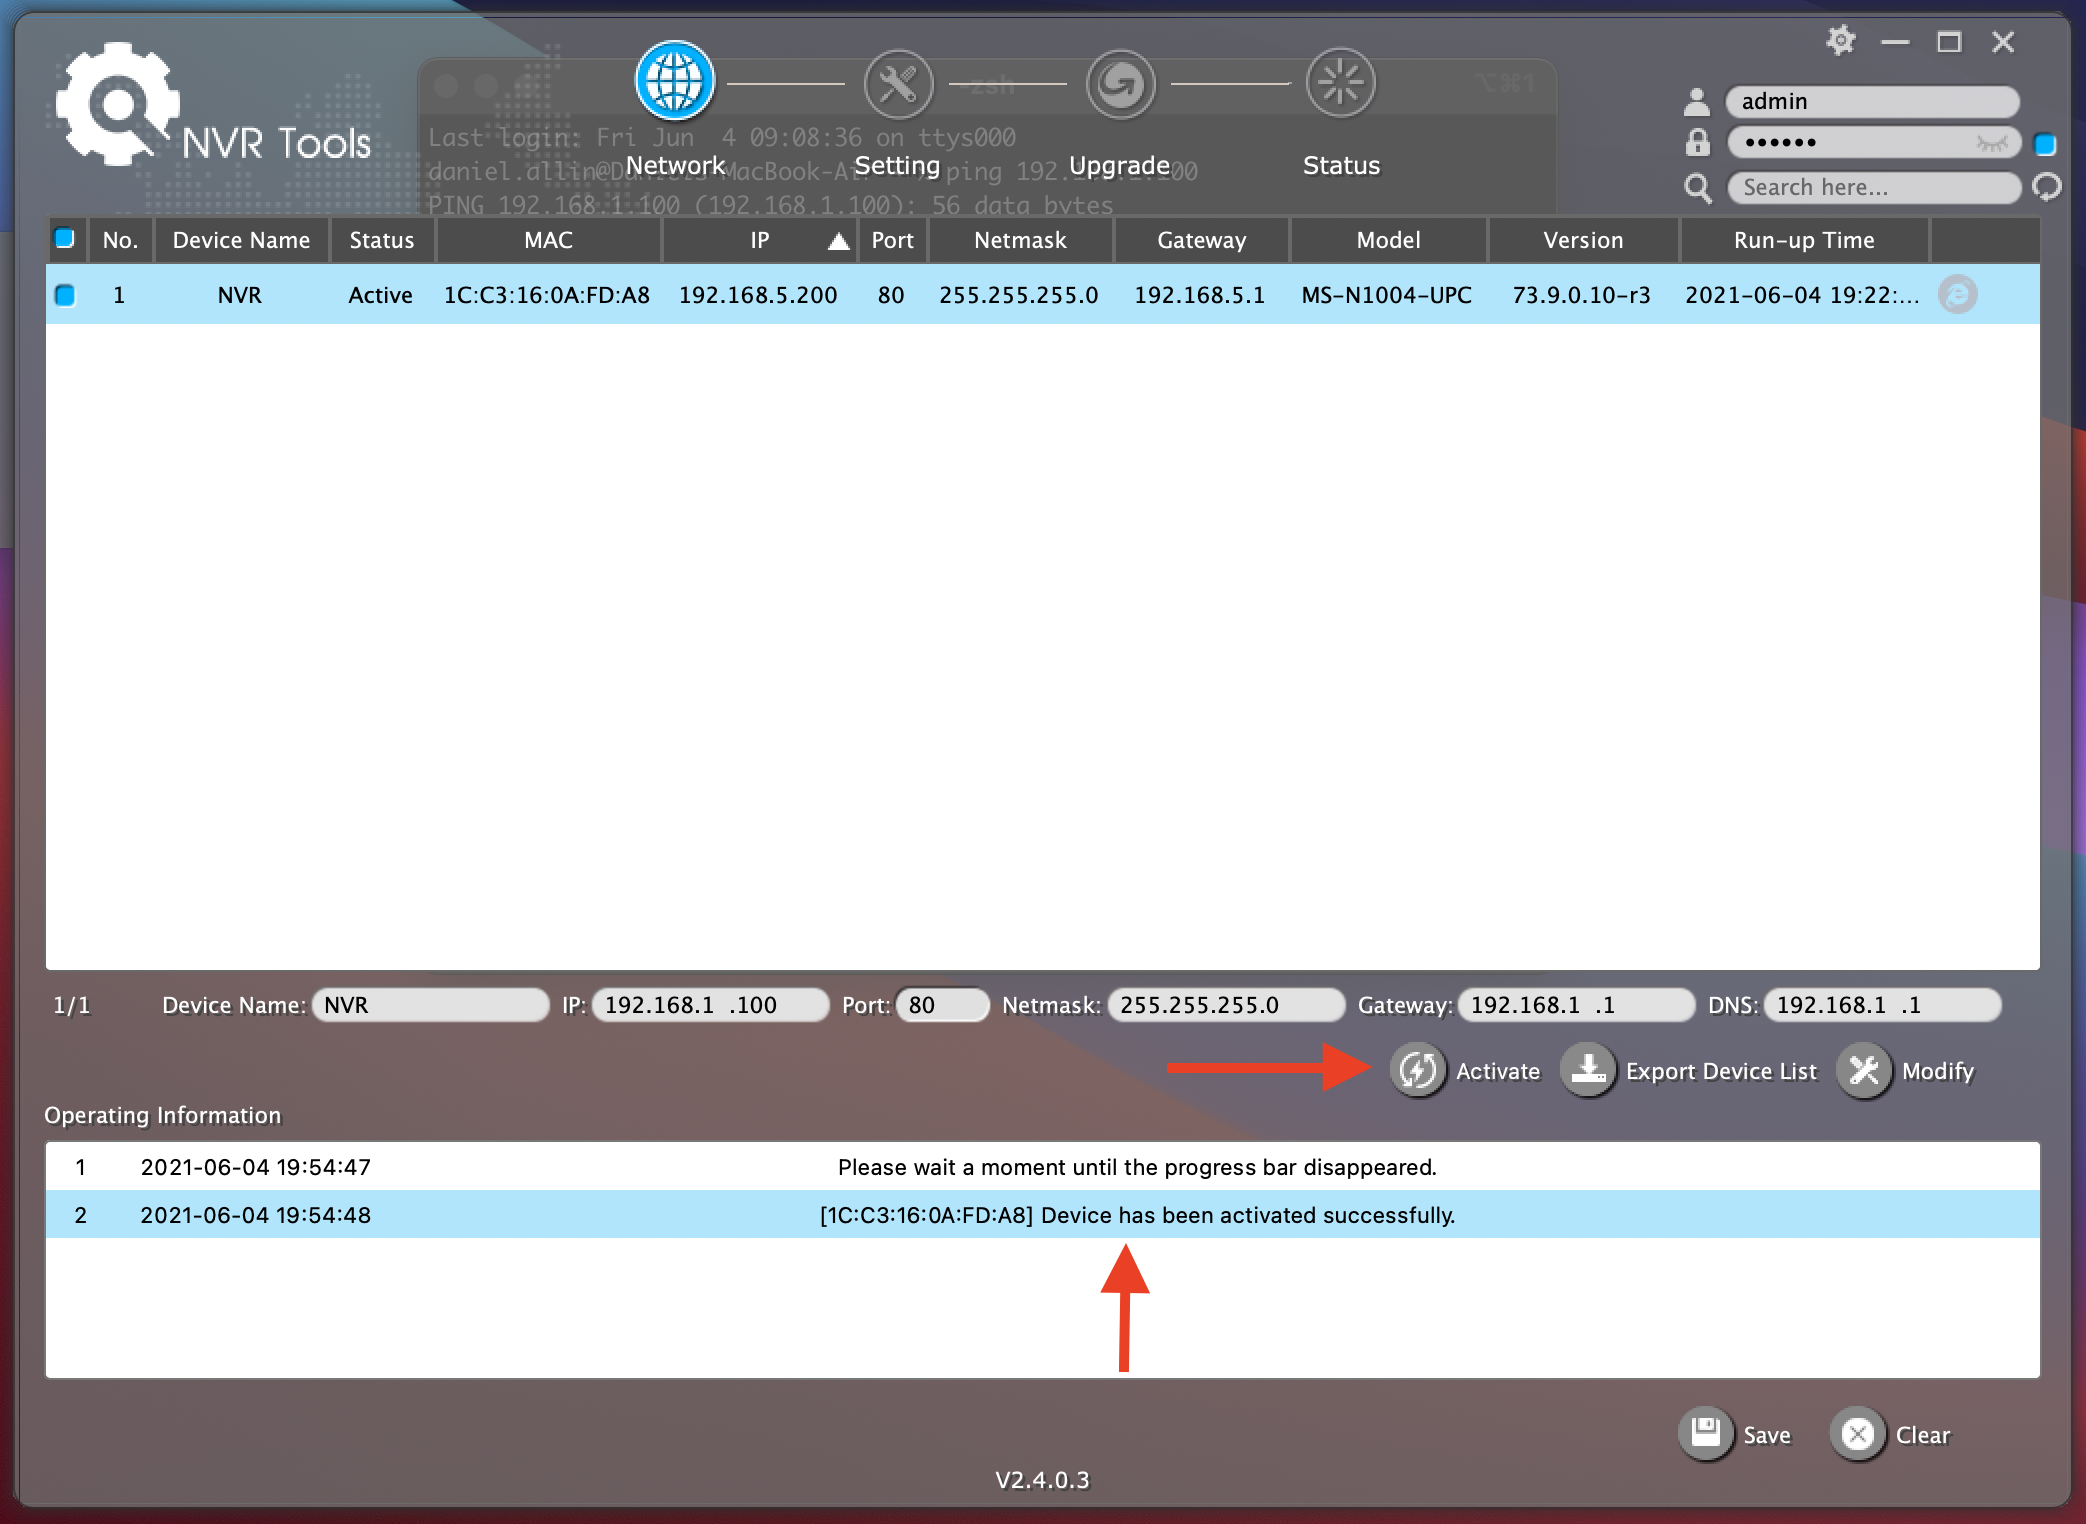
- Select the NVR in the list and click Activate. You will be prompted to enter a new password - make sure its a secure one! If you have activated it successfully you will see the Status now Active and it successful in the Operating Information section.

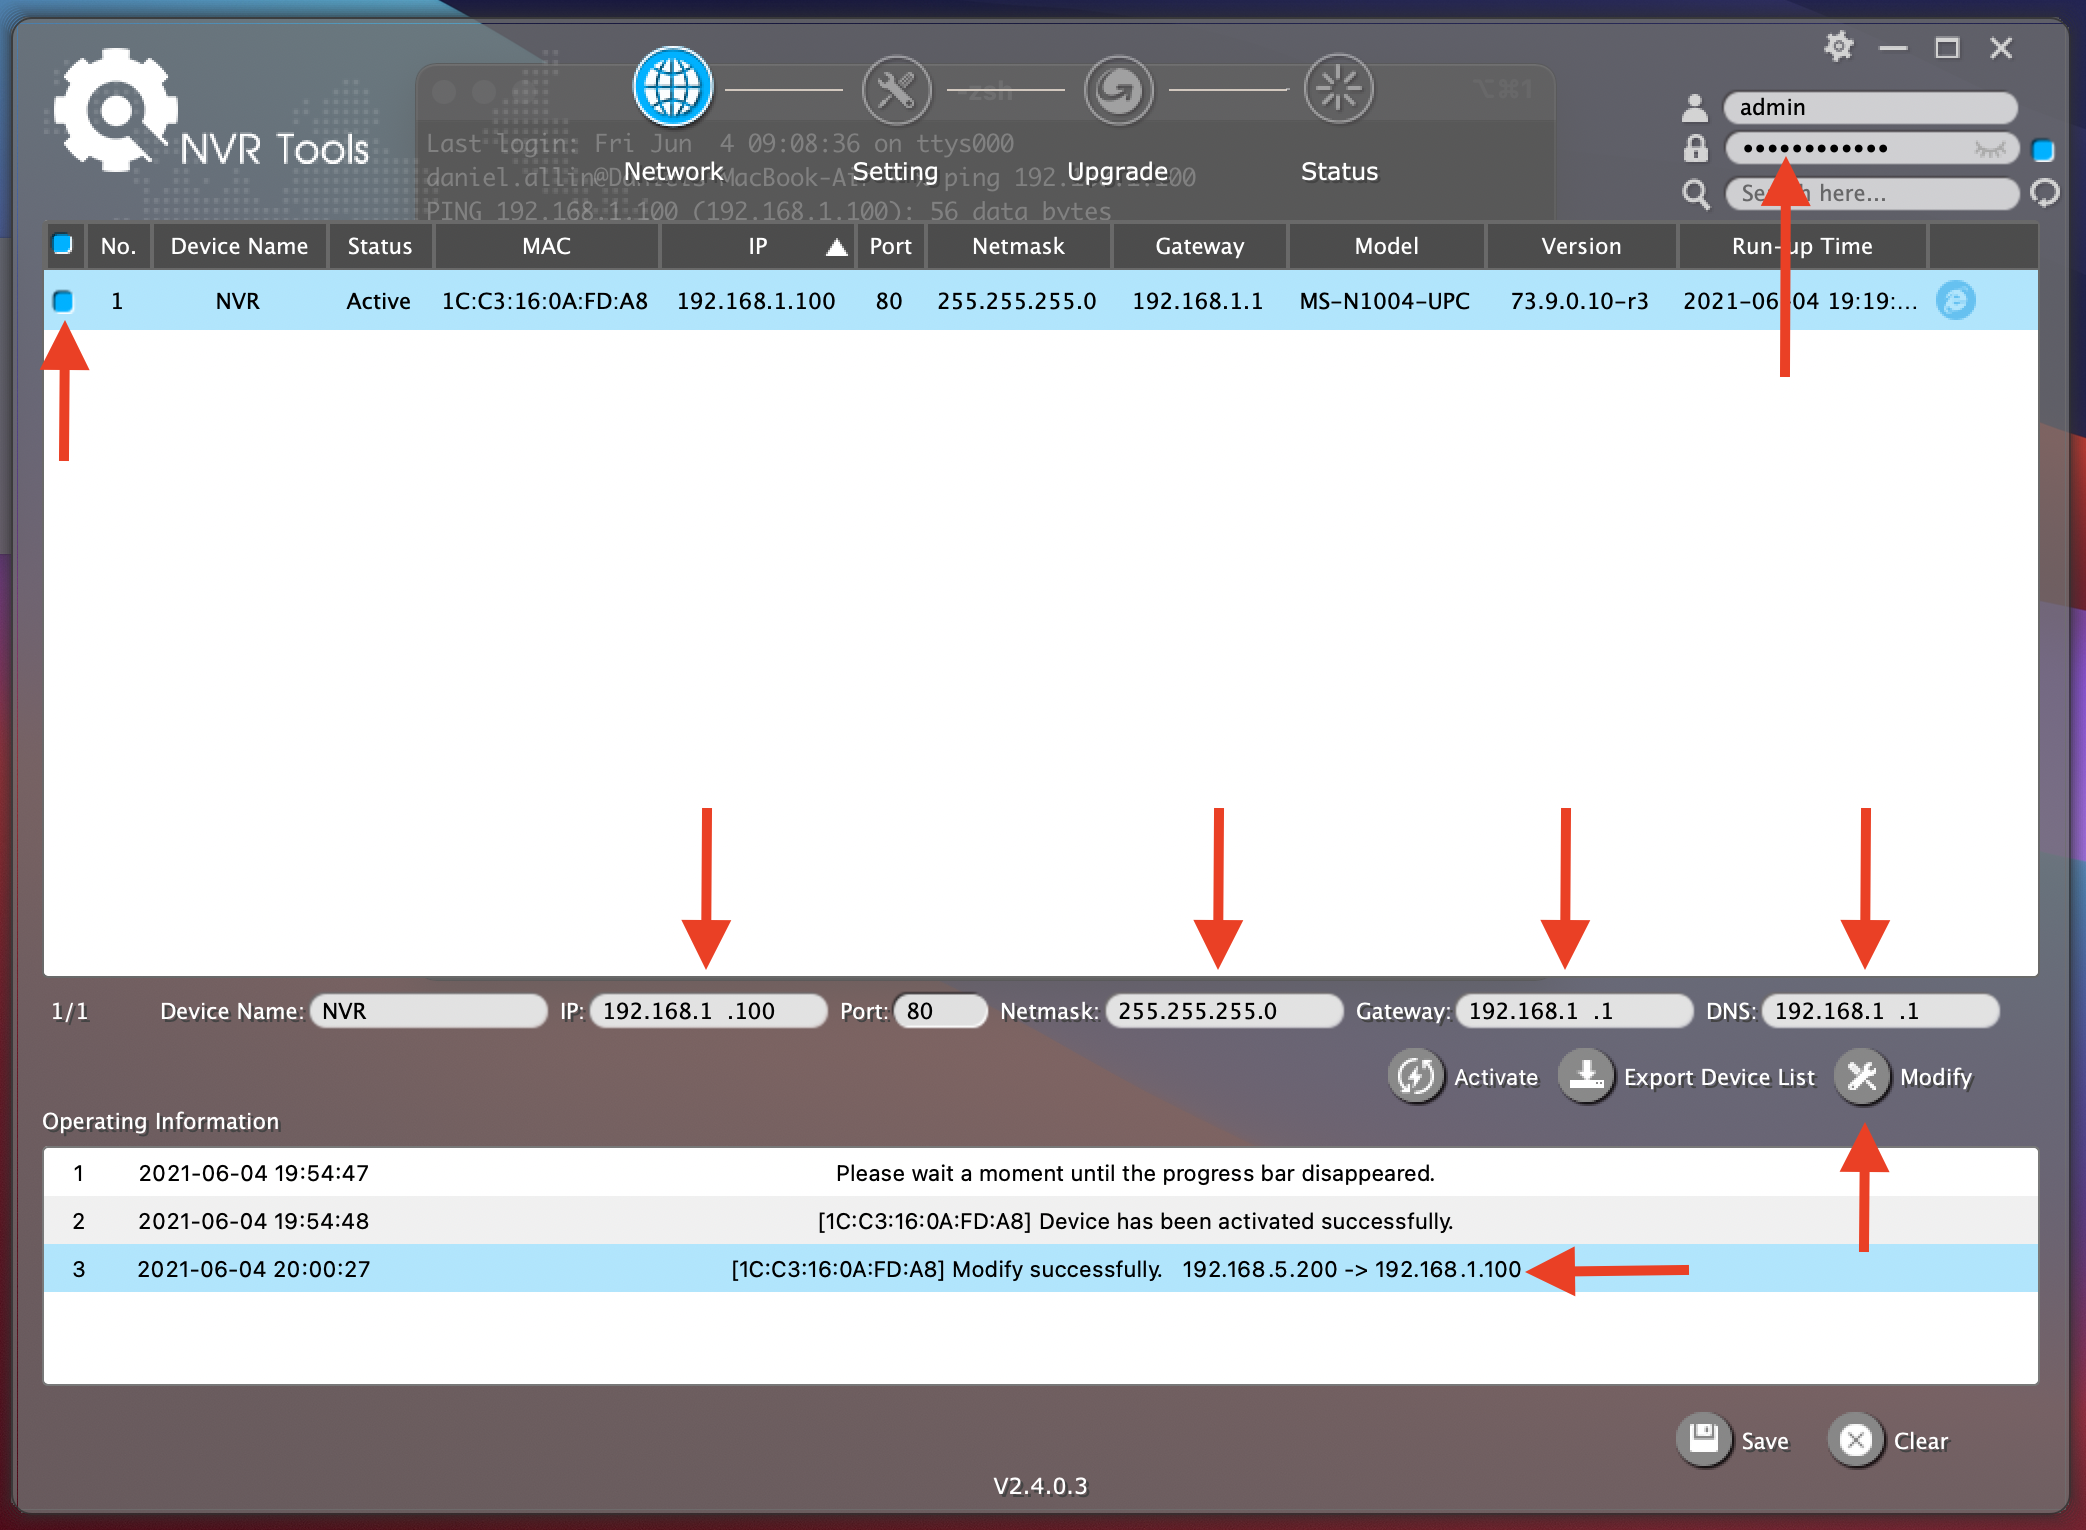
- Ensure you have selected the NVR in the list and the username and password is filled in (top right). Change the IP Address, Netmask, Gateway and DNS to suit your network and then click 'Modify'. You should receive a modify success response as seen in the Operating Information.

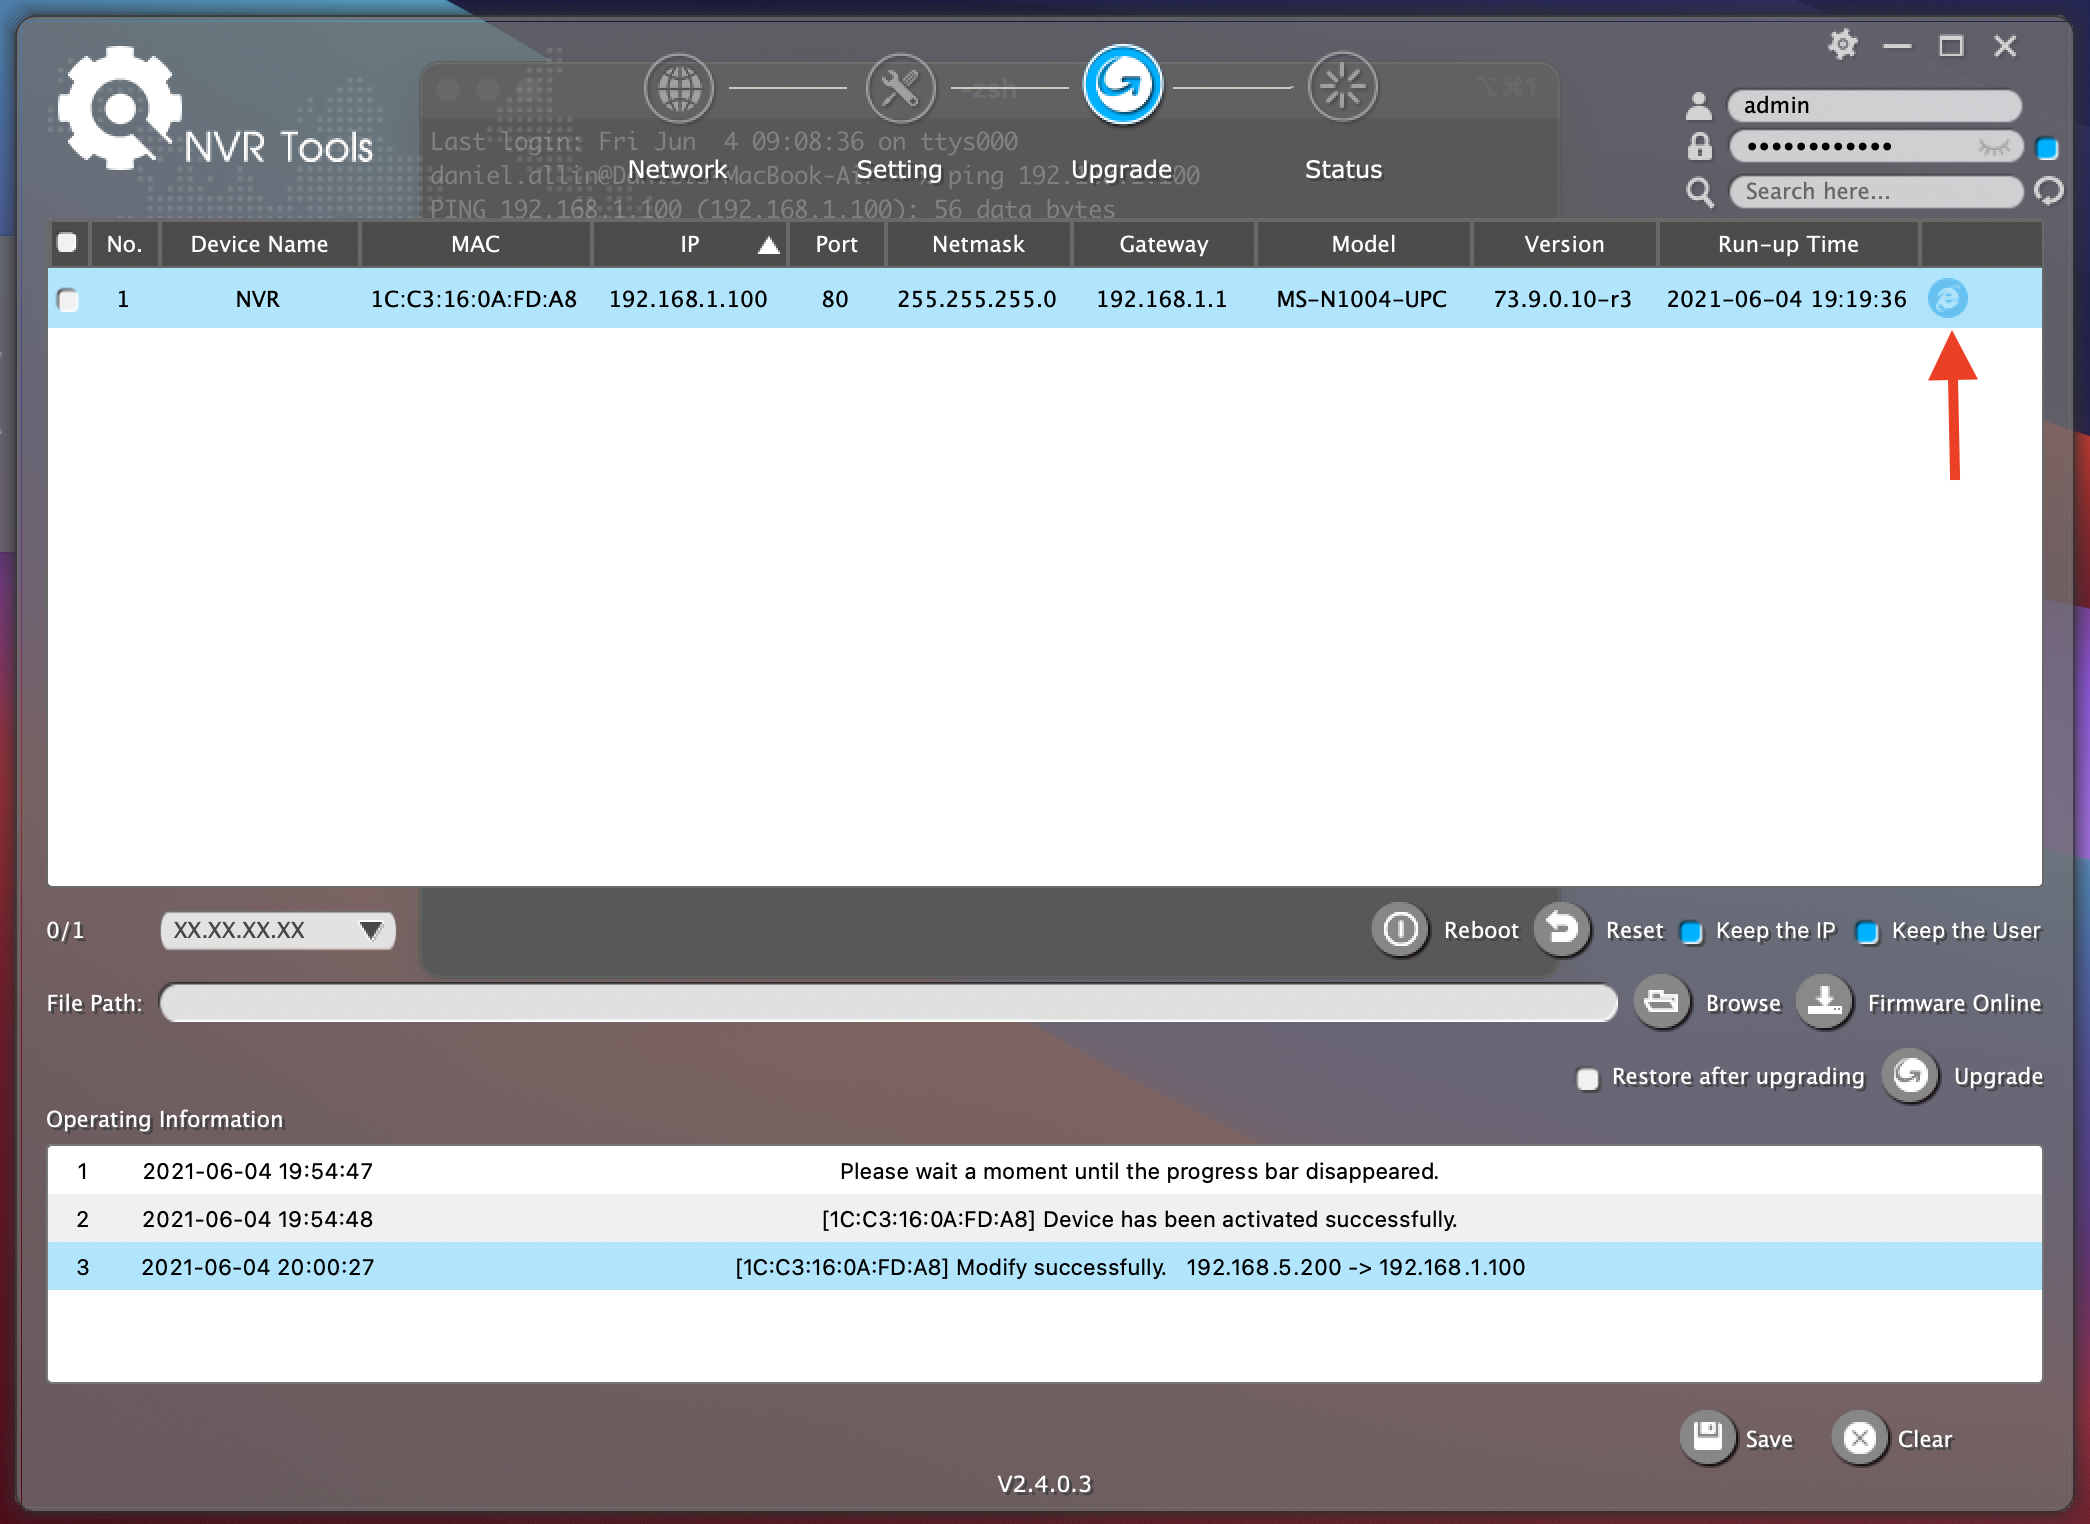
- Under the Upgrade section click reboot to reboot the NVR for the network settings to take effect.

- You can now access your NVR using the Username/Password and IP Address you have configured in your web browser.


Related Articles
Upgrading the Milesight NVR using Smart Tools
Did you find it helpful?
Yes
No
Can you please tell us how we can improve this article?
More articles in Getting Started


