In this article, we will explore how to configure Ubiquiti LTU-Lites to establish a reliable wireless point-to-point connection. These units can achieve throughput speeds of up to 300 Mbps at a distance of 1 km. To get started, you will need two LTU-Lite units. A fantastic feature of these models is that they come with POE injectors included in the box. All you will need are a few Ethernet cables to begin the setup.
Let’s Get Started:
By default, these devices have DHCP enabled, with a fallback address of 192.168.1.20. If you connect the device directly to your computer, you can access it by entering 192.168.1.20 into your browser's address bar. However, if you are connecting through a switch, the IP address will be randomly assigned. In this case, check your switch table to find the correct IP address.
Initial Configuration:
I recommend starting with the access point device. Once it is fully configured, unplug the LAN connection to the access point and connect it to the next device. If a link is established between both units with two LAN connections, the network may start looping data.
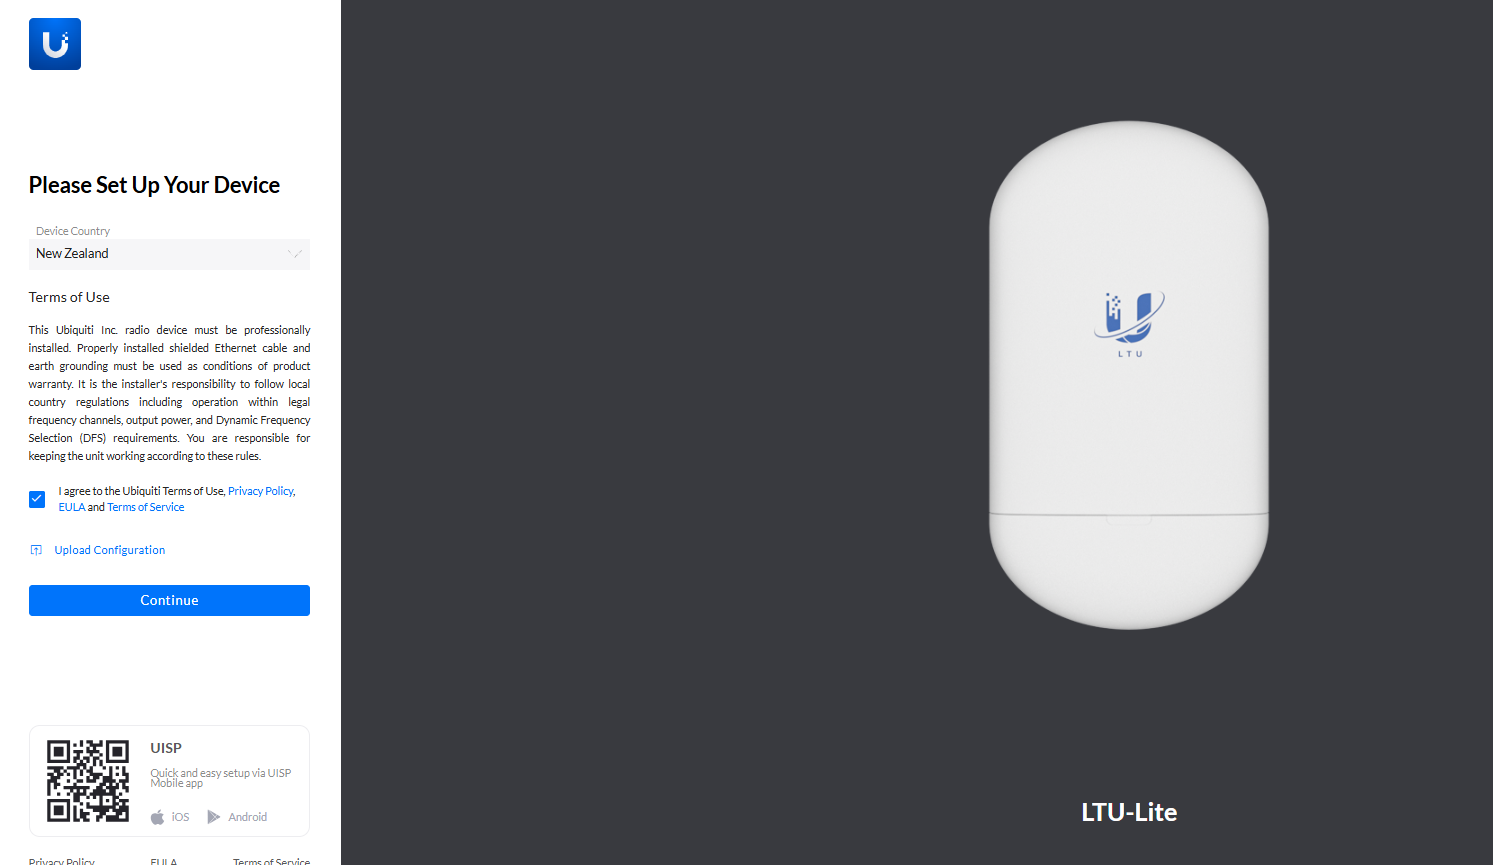
Upon first connection, the device will prompt you to select your country. This step is crucial, as different countries have varying regulations and preferred Wi-Fi channels.

Here, you will create your local account. Alternatively, you can use the UISP app if you prefer to set it up via mobile.
The first task when setting up these devices is to update the software version. Initially, these units were not designed for point-to-point (PTP) connections, but after a quick firmware upgrade, you will be able to access the correct settings. You can download the firmware here: https://ui.com/download/software/ltu-lite.
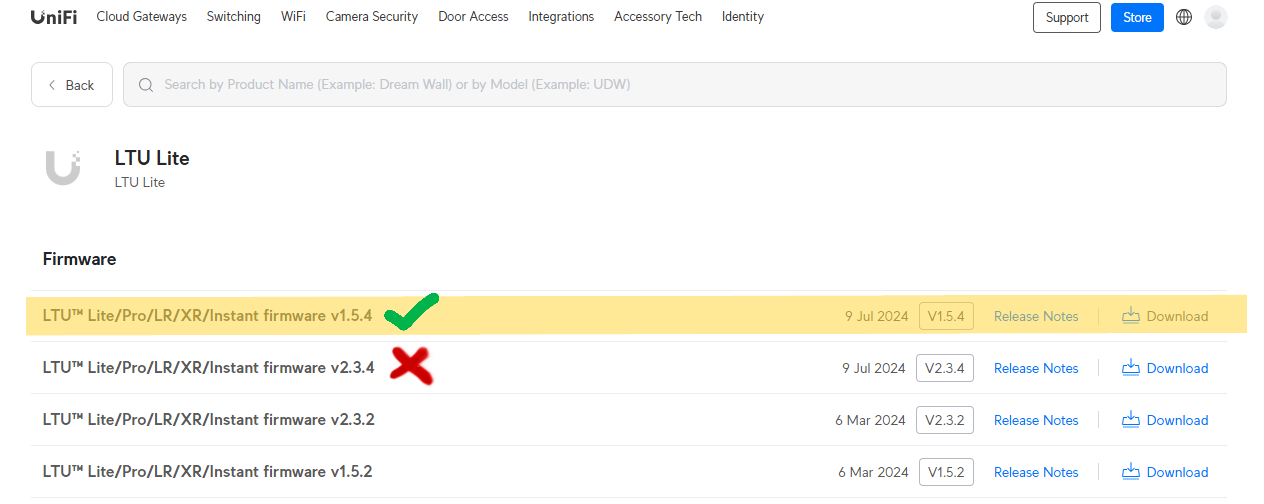
IMPORTANT: Version 2 does not support PTP connections with two LTU-Lites; version 1.5 does.

After downloading the firmware, you can upload it through the highlighted area. Keep this firmware handy, as we will need to update the other unit as well.
Every step so far will be repeated for both units, but now the configuration process will begin to diverge.
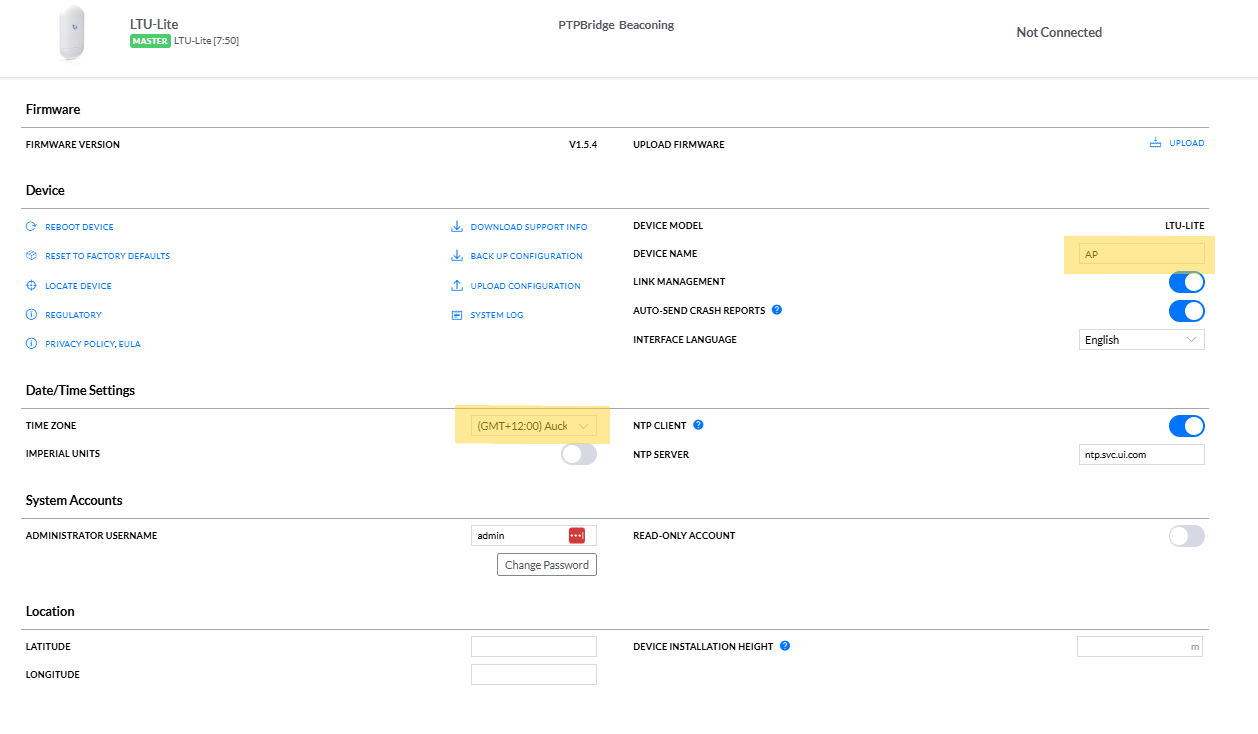
For the device name, I recommend labeling the unit you intend to use as your access point (AP). If you have multiple stations, consider including their location in their device names (e.g., ST-Workshop). Additionally, change the time zone to ensure that log files are understandable.
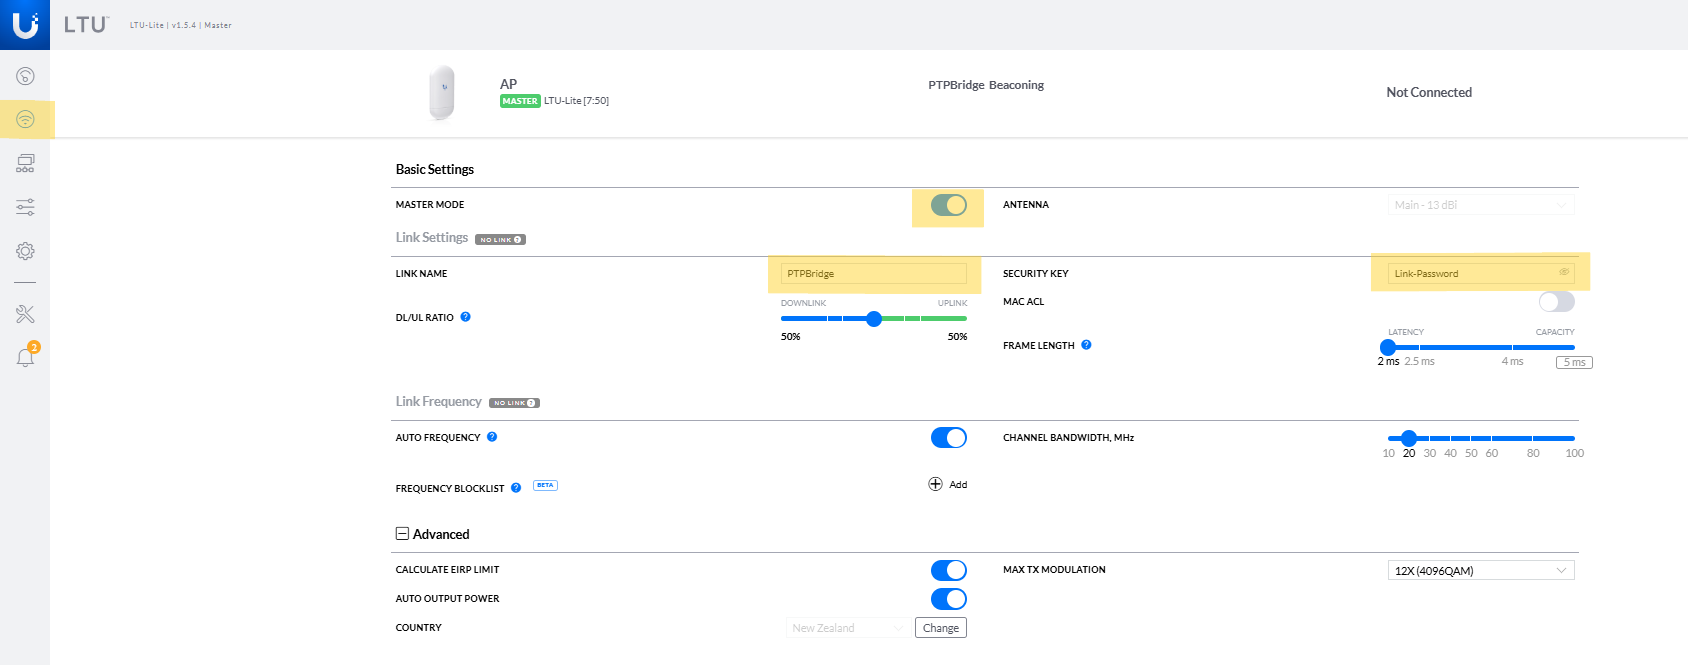
Within the ‘Wireless Tab,’ you will find important settings. Select ‘Master Mode’ for the access point and ensure that the Link Name and Security Key are identical for both units.

In the ‘Network Tab,’ change the IP address. I recommend setting the device to DHCP to avoid potential IP conflicts. Ensure that each device has a different fallback IP.
At this point, the access point device will be fully set up. Now, it’s time to unplug the Access Point unit and set up the Station unit. Repeat all steps previously shown and you should end up with a working link. ?
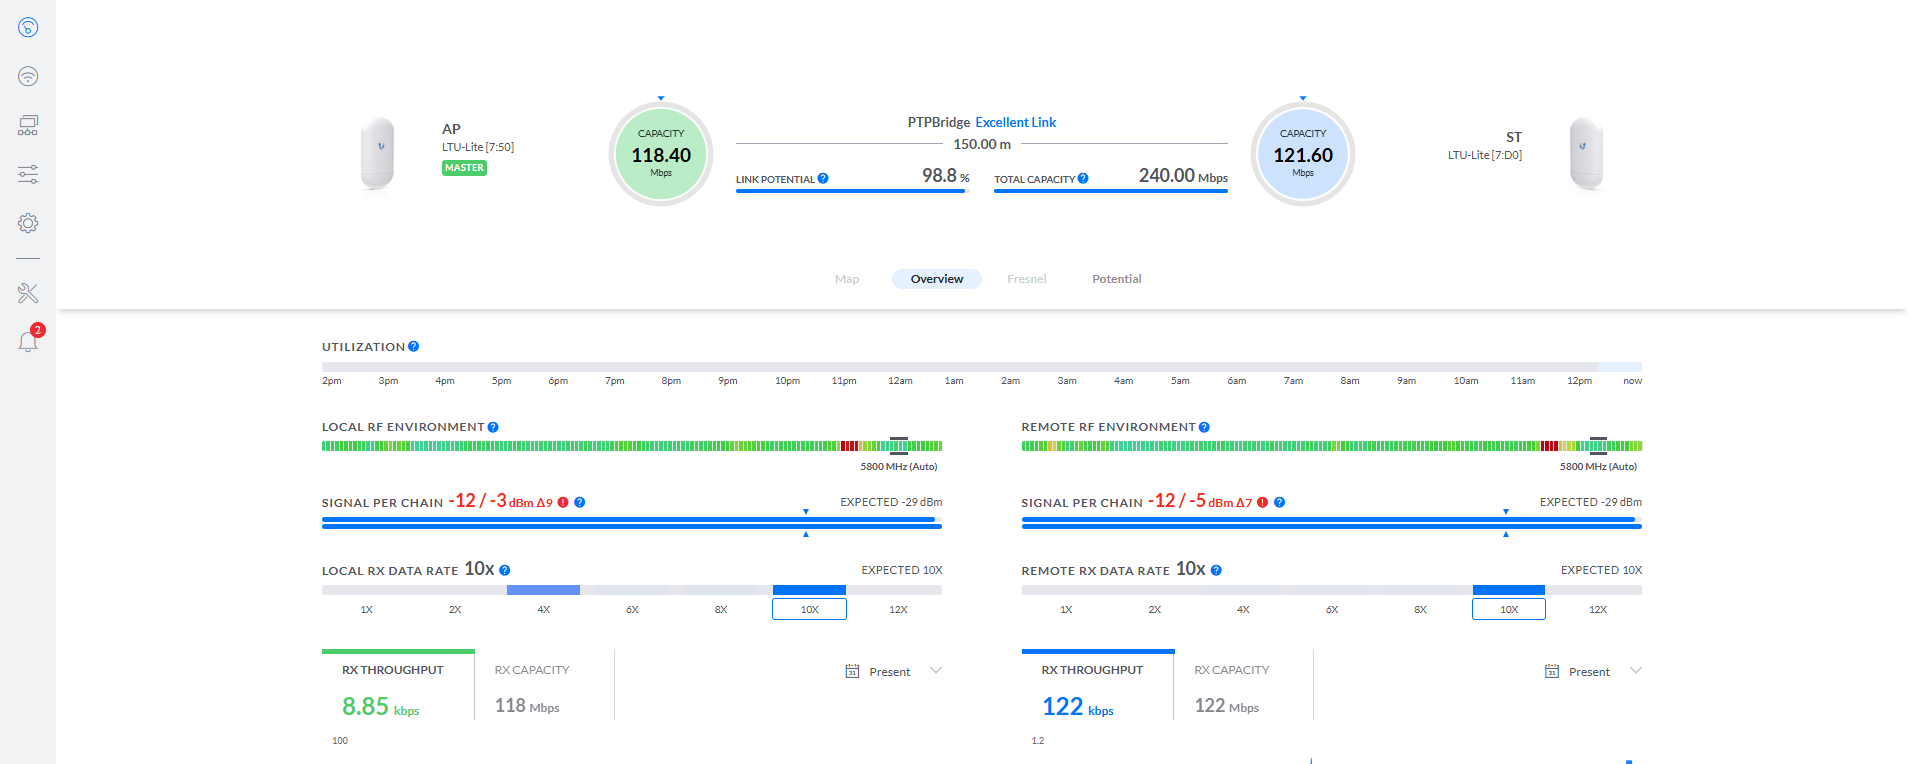
To verify that the link is active, check the Dashboard tab. As shown above, the link is active and has a total capacity of 240 Mbps.
To further enhance speed, you can adjust the Channel Bandwidth within the ‘Wireless’ tab. Increasing the bandwidth will boost speed but will reduce reliability and range.
If you ever have questions or concerns, give us a call and we can help you get it sorted. +64 03 741 1339